Create Dynamic Experiences
Perform the following steps to create a new Dynamic Experience:
-
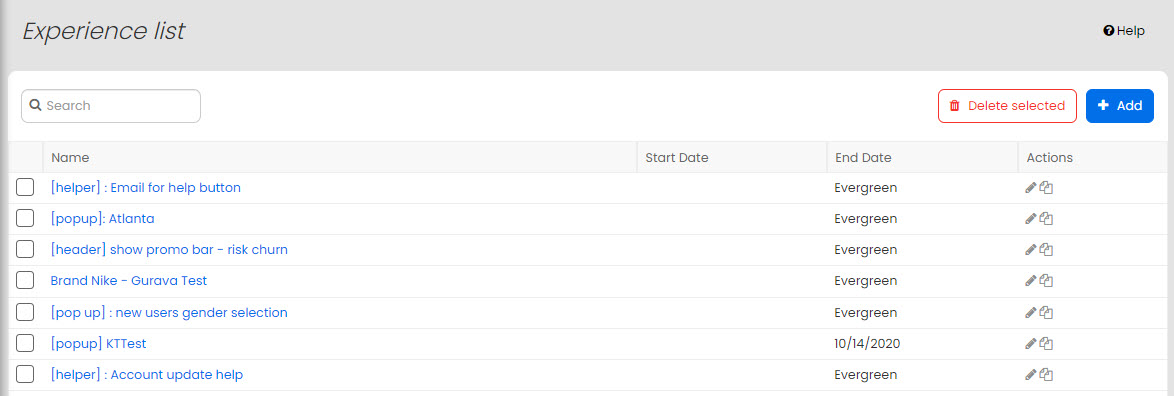
On the Omnichannel Personalization dashboard, go to Content > Dynamic Experiences.
The Experience list page is displayed.
-
Click + Add.
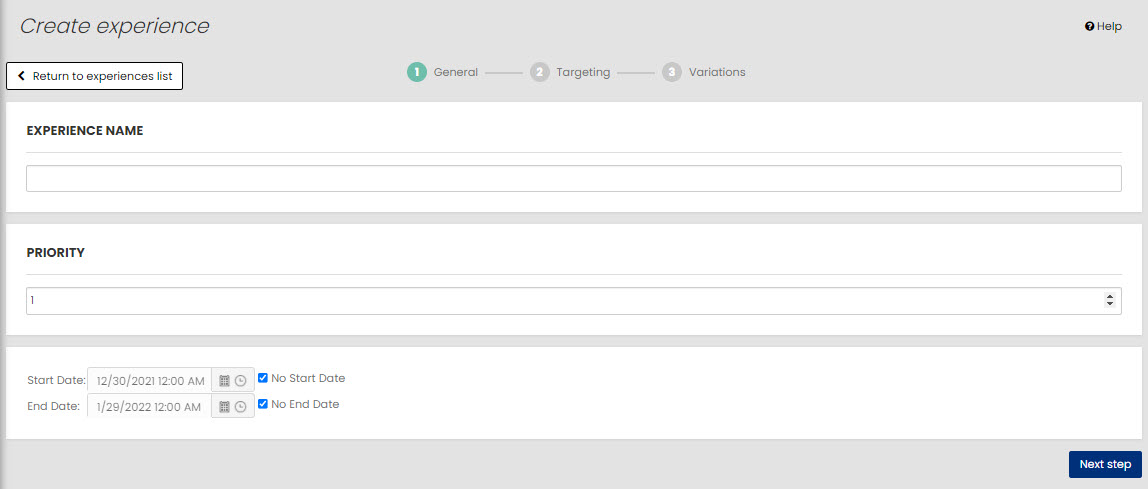
- Specify a descriptive name. Remember this is how you will find the experience again to edit it, and how others will know what the experience is.
- Set a Priority. A priority is used to determine which experience should execute when multiple experiences match the context.
- Specify Start Date and End Date. For timeless experiences, select the checkbox No Start Date and No End Date.
- Click Next Step.
-
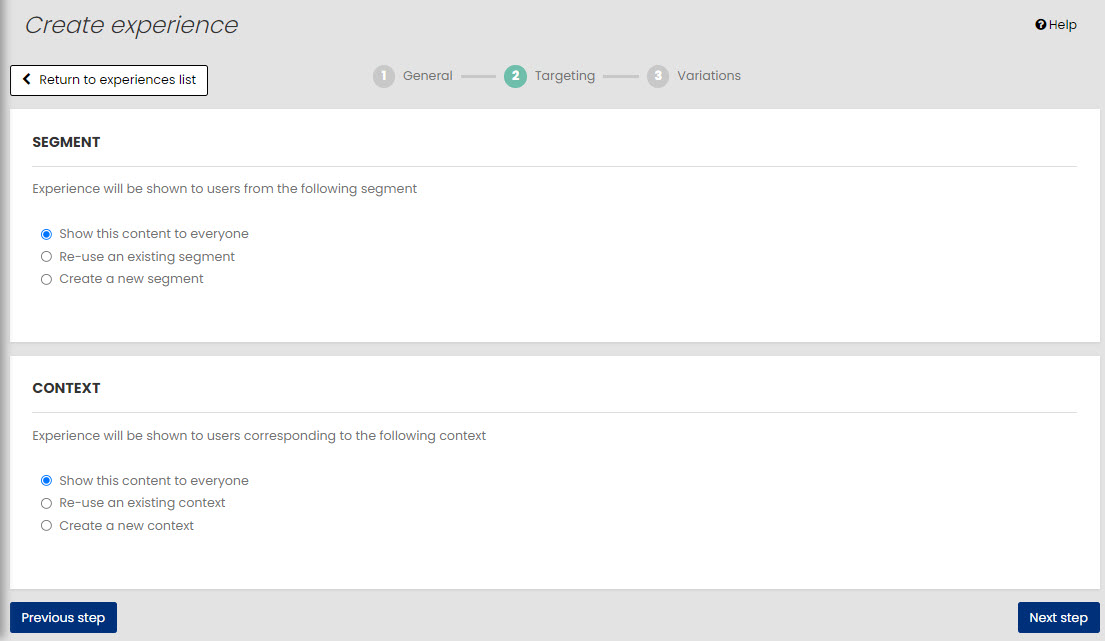
Chose the segment, meaning which customers will see the content by predefined segment. You can show the content to all customers, use a segment already defined for the site or create a new segment.
-
Choose the context, which will further define which customers will see the content. You can show the content to all users within the chosen segment, use an existing context or create a new context.
For example, you could choose a segment defined as "Social Visitor" and a context for the brand "Samsung." This combination will trigger the content when a user who was referred from a Social Network is looking at items branded as "Samsung".
-
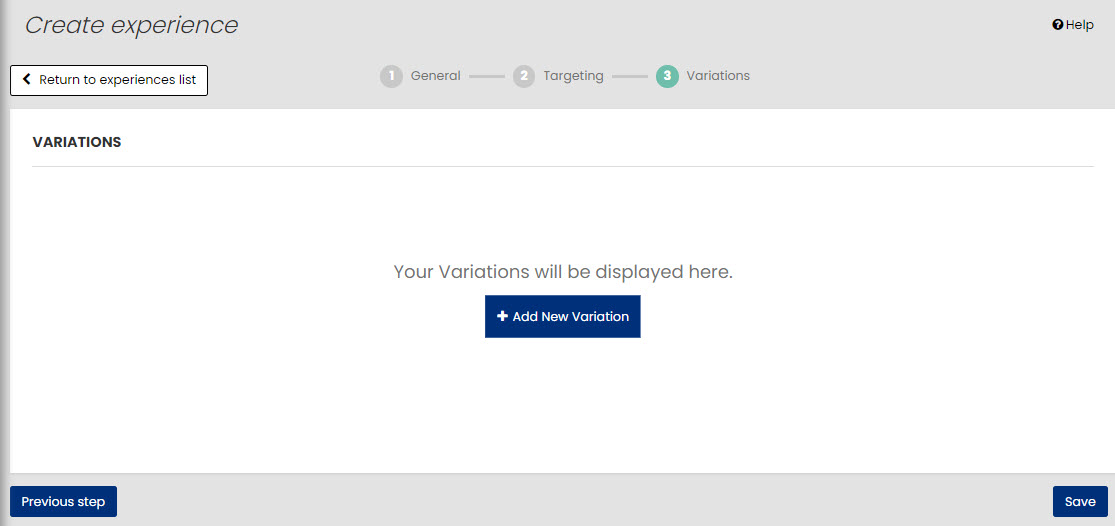
To create a new variation, click +Add New Variation.
You can manage existing variations or create a new variation.
-
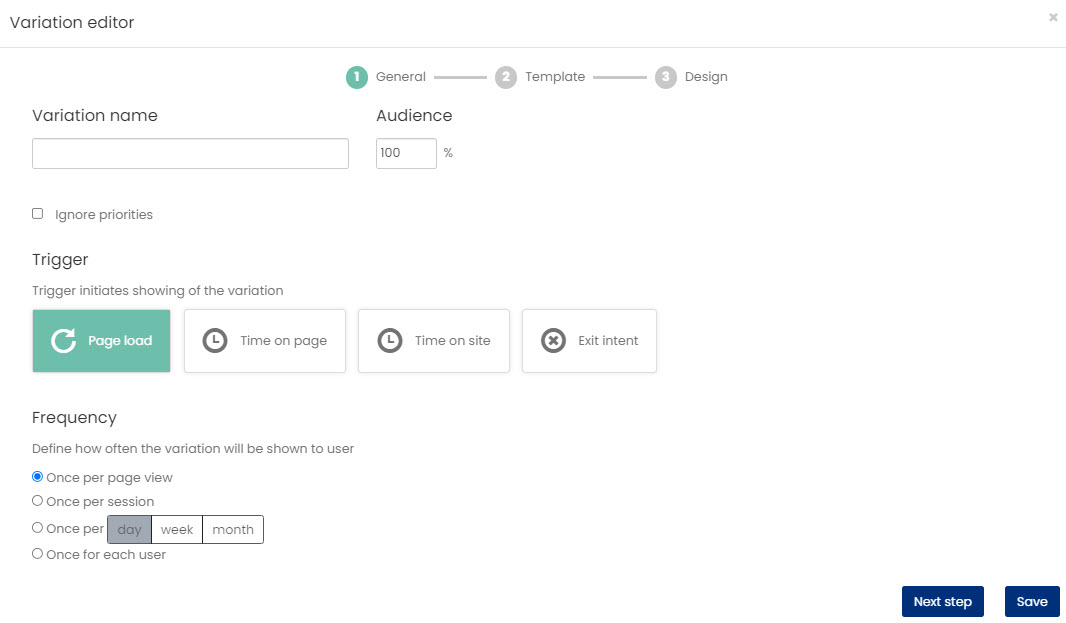
Specify the variation name and assign the percentage of audience to see this variation.
-
Choose the desired trigger:
- Page load: This triggers the pop-up content when a specific page loads, for example it could be set to pop-up when the cart page loads
- Time on page: This triggers the pop-up content when the customer has been on the page for a specific period of time.
- Time on site: This triggers the pop-up content when the customer has been on the site for a specific period of time.
- Exit intent: This triggers the pop-up content when the customer indicates an intent to leave the site by moving their mouse to the address bar.
-
If either of the time specific choices are made, enter the number of seconds the system should wait before triggering the popup.
-
Set the frequency, the number of times this experience should be shown to a specific user.
- Once per page view: The experience loads on each opening of a page.
- Once per session: The experience loads once for each session, will not load if session has the same id as the previous.
- Once per day: The experience loads only once per day, will not load again on that day, but will load once again next day.
- Once per week: The experience loads as usual (once a day), will not load again in the next 6 days, but will load again on the 8th day.
- Once per month: The experience loads as usual (once a day) will not load again for 29(or 30) days but will load again on the 31st (or 32) day.
- Once for each user: The experience loads only once for each user, will not load if user has the same ID as the previous.
-
Click Next Step.
-
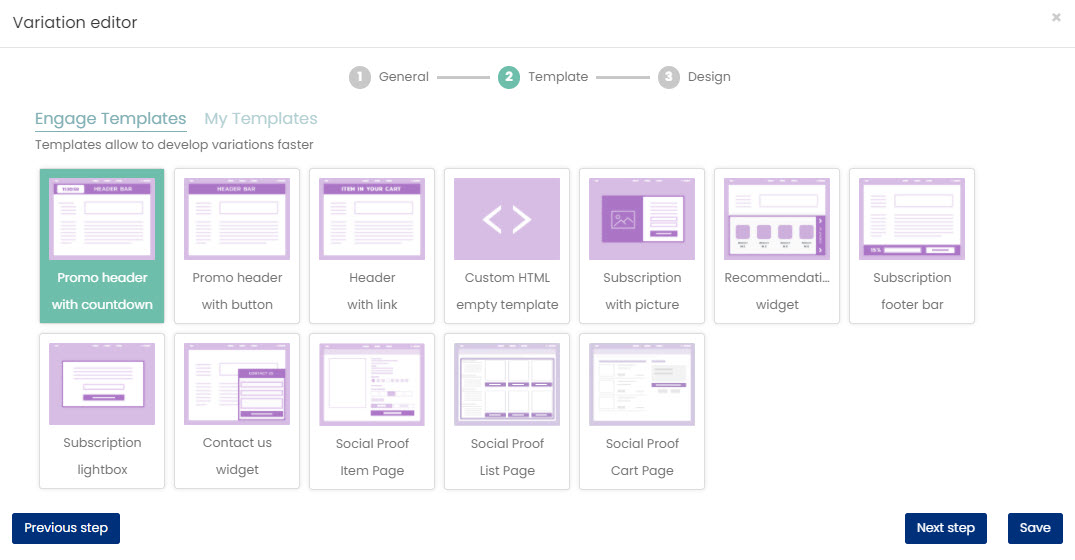
On the Variation Editor, choose the template for this variation. The current options are:
-
Promo header with Countdown
-
Promo header with button
-
Header with Link
-
Custom HTML (empty template)
-
Subscription with picture
-
Recommendation’s widget
-
Subscription footer bar
-
Subscription Light box
-
Contact us widget
-
Social Proof Item Image
-
Social Proof List Page
-
Social Proof Cart Page
-
-
Click Next Step.
-
On the subsequent pages you will set up your template with your chosen colors and content. Each type of template has its own set up.
-
Click Save.